PhD, site expert.
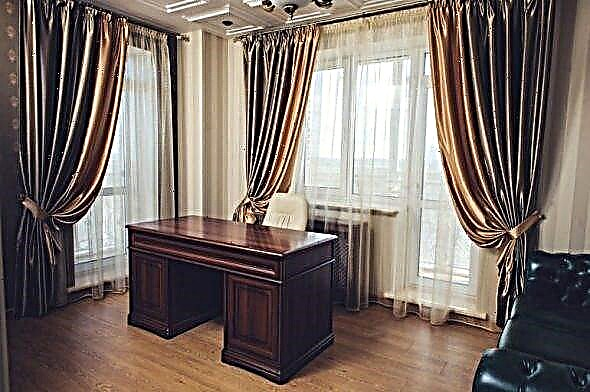
From the moment of its appearance on earth, a man strove to create comfortable living conditions: a dry, warm and beautiful home. Modern apartments and houses are almost fully consistent with these wishes. Some discomfort is caused only by central heating systems with a radiator type of heat transfer: the floor is always cool, the warmest space under the ceiling, and in the house (apartment) there is a constant upward flow of air near the batteries, causing drafts. Laying an infrared warm floor under the laminate solves this problem.

Principle of action and design features
In nature, heat is transmitted in two ways:
- By convection, when heat is transferred directly from body to body by air,
- Rays (so the Earth receives heat from the Sun). A physical principle is involved here, based on the ability of bodies heated above 60 degrees Celsius to emit waves of 0.75-100 microns in length, having an electromagnetic nature. The basis of infrared emitters is the ability of bodies to emit waves in a given range (from 5.6 to 100 microns).
The infrared "warm floor" consists of a base layer, conductive strips (copper and silver), a carbon emitter and a laminating film. Under the influence of current, the carbon paste begins to emit rays, which, having reached a dense body, begin to heat it.
In the case of a warm floor, heating is carried out directly by the laminate, which already convectively heats the room. Since the rays have different lengths, part of them passes through the floor and heats the surrounding objects. That is why it is forbidden to place furniture over heating elements in order to avoid overheating of the IR film.

Film heaters are available with power from 150 to 440 W / m 2 (for a laminate, the maximum power should not exceed 150 W / m 2). The standard film width can be 4 sizes - 50, 60, 80 and 100 cm. Any length - produced in rolls. However, at certain intervals, special strips are provided along which the film is cut off of any length - a step of 20 or 25 cm.

Advantages and disadvantages of IR floor heating
The infrared film underfloor heating under the laminate has both supporters and opponents. This is due to the fact that this heating system has many positive and negative qualities. At the same time, the strengths are really impressive.
- Features of heat transfer allow heating only those surfaces where a person is present: walkways, jobs and rest areas. In this case, no energy is spent on heating the bottom of the furniture, which leads to a reduction of up to 20-30% in the consumption of electric energy and, consequently, family finances. Another plus of this approach to the placement of IR film is its savings.
- Low cost of materials and installation work when assembling infrared floor heating. Clarification is needed here. The price of a set of film heating is very high when compared with other types of "warm floor". It starts from 2,000 rubles. for accessories (includes a temperature sensor, temperature regulator, electric wires, contacts, bitumen adhesive tape), plus from 650 rubles. for each m 2 IR film. However, significant costs for the purchase of materials overlap with the low cost of installation.
- Infrared heating system is not afraid of subzero temperatures - manufacturers allow its operation at temperatures up to –70 o C. This means that if you are in unheated rooms for a long time in the winter, the system does not lose working capacity. It is difficult to overestimate this property when using IR film in country-type houses, where there is no permanent habitat, and in dachas.
- There are no restrictions on installation either by type of building or by type of premises. The system can be installed in individual houses and apartments, a living room, a children's room, a kitchen, a bathroom, etc. In this case, there is no risk of flooding the neighbors as if in a water "warm field".
- Simple assembly and disassembly. Connecting current-carrying elements and connecting to electricity does not require skills in work, but attentiveness and pedantry, which allows you to complete the whole cycle of work with your own hands. In this case, the installation is very fast.
- The infrared spectrum of carbon elements is completely identical to solar heat.
- No repair required. The failure of one or more radiating bands does not affect the operation of the film as a whole - the connection to the mains is parallel. If the need arose to replace the film completely, then no problems are foreseen here - it is easily dismantled.
- A uniform warming up of the room is achieved. At the same time, what is important, warm layers of air are at the bottom of the room, and not under the ceiling, as when heating with batteries. This distribution of heat makes it possible in practice to realize one of the optimal conditions for human life - "keep your feet warm and your head in the cold."
- Feeling warm, you can walk barefoot which is good for health, as well as letting small children down on it, not being afraid to catch them under the influence of in-house drafts.
- Long service life of the film floors is ensured even during uninterrupted operation. They do not need care, neither technical, nor any other.
- There are no injection and convection movements of air flows inside the room, which gives an unexpected result: there are no indoor drafts, dust practically does not rise into the air (most remains in the places of formation), which is important for allergy sufferers (do not get sick) and housewives (less cleaning work).
So that this article does not look like an advertisement for infrared heating systems, here are its disadvantages, which will allow the consumer to get complete information about this heating method. There are few of them, but they can significantly shake the desire to install an infrared warm floor under the laminate in an apartment or house.
1. Despite the high efficiency of carbon emitters (more than 80%), the power consumption of the system is very large, what will cost the owners a tidy amount when paying for electricity. We show this with a conditional example.
| The total area of the apartment, m2 | 78 |
|---|---|
| The area of the laid film, m2 | 51 |
| Power consumption per m2, W / h | 200 |
| Power utilization factor (when heated to the required temperature, the system turns off) | 0.6 |
| Electric energy consumption per apartment per hour of heating, kW / h (200 / 1000x0.6x51) | 6.12 |
| Electricity consumption per apartment per day, kW / h | 146.88 |
| Monthly energy consumption for heating, kW / h | 4406.4 |
| The cost of 1 kW / hour, rub. daily rate (3/4) | 3.61 |
| The cost of 1 kW / hour, rub. night rate (1/4) | 2.09 |
| Heating costs per month, rub. | 15124.97 |
| Heating costs per year, rub. | 90749.82 |
As you can see, for a population with incomes slightly below the average level, such heating is financially unbearable. Therefore, we can only talk about an additional source of heating, for example, the floor in the bathroom or the bathroom, included when they visit (the surface of the floor warms up for ten seconds).
2. Carbon emitters operate from a 220 W network, which leads to several types of risk:
- electric shock
- short circuit when moisture gets on the film,
- fires.
Judging by the reviews on the forums, the presence of grounding and automatic shutdown during a short circuit do not always give a 100% guarantee of the safe operation of the film.
3. Dependence on power supply. With frequent blackouts, the effect of infrared heating decreases dramatically.
4. It will not work to change the arrangement of furniture or add something to a room without changing the layout of the film heaters. You have to dismantle the flooring and lay the film on a new layout.
The above strengths and weaknesses of IR heaters allow you to weigh the pros and cons and make your own choice. Note that with the growth of well-being of the population, the popularity of systems will only grow - they have many attractive advantages.
Which laminate is better to use in conjunction with IR floor heating
The effect of installing an IR film can be reduced or even eliminated by the wrong choice of laminate for finishing the floor. Lamellas that are not appropriate for the type of heater can be deformed, emit formaldehyde in excess of sanitary standards, conduct heat poorly, etc.
You can avoid these problems, knowing which laminate under the infrared floor heating, how to choose. It must meet the following requirements:
- Have a lock connection. Using glue to connect the panels creates a rigid continuous floor covering that breaks during sharp temperature fluctuations, which happens when the film is included in the network,

- Have a good heat. Laminate manufacturers evaluate this ability of lamellas by the coefficient of thermal resistance. The smaller it is, the better the heat from the heater is transferred to the heated room. For infrared "warm floor" it should be in the range of 0.05-0.10 m 2 x ° K / W,
- Have a thickness of 8 to 9 mm. Thin panels break the lock joint during expansion-contraction during temperature changes, thick ones do not conduct heat well - they have a low coefficient of thermal conductivity,
- Do not emit formaldehyde when heated to 27-30 ° C. When buying a laminate, you must consider this factor and buy a flooring of class E0 or E1,
- Have a wear resistance of at least 3 classes. The higher the score, the stronger the floor.
Attention: IR heaters can be laid not only in combination with a wooden (pressed wood fiber) laminate, but also under vinyl - the manufacturer allows.
Information on the requirements considered can be obtained from pictograms printed on the inserts (see photo) and digital symbols.
Installation Instructions for Infrared Underfloor Heating
The installation technology of IR floor heating consists of several independent types of work performed in strict order:
- capacity planning and arrangement of heating elements,
- surface preparation
- assembly work on the assembly of the heating system,
- connection to electric networks,
- connecting the thermostat.
Planning and placement rules
Before starting installation work, you need to plan in detail the future heating system:
- reflect the location of the furniture,
- calculate the length and width of each strip of film,
- calculate the capacity of the system (you can contact the sellers for advice),
- draw with a pencil or pen a layout of the elements emitting infrared rays, indicate the location of the temperature sensor, determine the connection order of the wiring so that they do not cross (you can connect both on one side or both).
In this case, it is necessary to take into account some requirements and observe the existing nuances:
- along the length of the film is cut every 20 or 25 cm,

- heating elements must be laid along the room - the number of network connections is reduced,
- The IR film should be 0.25-0.30 m from the walls,
- exclude the location of the film under the furniture - overheating of the heating elements and burnout of carbon strips occurs,
- between the rows of film should be 5 cm,
- the temperature sensor is located in the middle of the film strip, but with the condition that its standard wiring is enough for the temperature regulator.
The instructions on how to lay an infrared warm floor under a laminate do not have the most important stage of work: buying the necessary materials, tools and devices. Therefore, the next step on the way to the warm floor is a trip to the hardware store.
Materials and Tools
To build infrared floor heating, you need to buy:
Firstly, a set of film underfloor heating, which includes:
- IR film (sold 0.5 m wide, 0.6 m wide, 0.8 m wide, 1.0 m wide),
- electric wires,
- fasteners-clamps for fixing the infrared film,
- contact clips
- bitumen adhesive tape.
- temperature sensor with wire,
- temperature regulator
- foil backing
- a plastic film for waterproofing the heating system from leakage of water spilled onto the floor,
- electrical tape
- household or masking tape,
- scissors (construction knife),
- pliers
- Roulette
- ballpoint pen or simple pencil.
Training
A thin film of the heating element reacts very sensitively to the slightest irregularities in the base of the floor - it is easily damaged. Therefore, the screed should have a smooth, dry surface (how to perform screed work can be found in the materials “Technology for wet screed with expanded clay” and “Dry screed with expanded clay”).
Before laying the film:
- screed surface is swept and vacuum cleaned,
- a foil substrate (3 mm thick) is laid with the reflecting side up, so as not to heat the base of the floor,
- the joints of the substrate are glued with foil (masking allowed) with adhesive tape,

- a recess under the temperature sensor is cut out in the substrate (a similar operation under the terminals and wires is carried out after connecting the system to the temperature control unit).

Network connection
The wires from the film are connected through special terminals to the temperature control unit. The system is powered up without fail through an automatic machine - a special protective device (RCD). If there is no knowledge on calculating its power, you need to seek help from a specialist. Twisting of the ends of the wires should be avoided - the junction may overheat due to poor contact.

Attention: the connection of the IR film to the outlet is strictly prohibited.
Ensuring complete safety will help grounding the power system.

Thermostat connection
Self-regulation of the system occurs with the help of a temperature sensor and a temperature regulator. The sensor is connected to the unit with a standard wire, which is forbidden to be extended - the signal strength is distorted. The order and connection diagram are placed in the instructions that are attached to the thermostat block (they differ from one manufacturer to another).
Upon completion of the installation, a trial run is carried out. If everything is done correctly, you can start laying the laminate.
The nuances of the subsequent installation of the laminate
Laying a laminate on an infrared heat-insulated floor is carried out only after work is carried out to protect the heating system from water spilled on the floor (water can cause a short circuit if it gets on the IR film). To do this, on the top of the substrate and heating elements, a plastic film is laid out, overlapping, with an approach to the walls.
The joint seams are carefully sealed with tape. After that, you can mount the laminate. For those who plan to carry out these works on their own, we recommend that you familiarize yourself with the work "How to lay a laminate on a concrete floor?"
Conclusion
Infrared "warm floor" is gaining popularity due to many positive characteristics. But the significant cost of paying for electricity holds back its sales. Installation is simple, but requires careful implementation of all requirements. The most important of them:
- very flat screed surface
- the substrate must be foil,
- all open contacts are isolated,
- the terminals, electrical wires and temperature meter must be recessed into the substrate,
- network connection is carried out only through RCD,
- a waterproofing film made of polyethylene is laid on top of the heating elements.
It is necessary to select the laminate according to the pictograms and inscriptions - are on the insert.
Pros and cons of infrared warm floor
Before deciding whether to install an underfloor heating system based on infrared film, it is necessary to understand its positive and negative qualities.
The advantages of the material include:
- The film is located only in those places that are subject to heating.You don’t have to spend energy on heating the space occupied by furniture,
- The ease of installation of the material allows you to perform all the work yourself, which positively affects the total cost,
- IR film withstands temperature extremes and can work even at minus values. This feature allows you to use it in country houses that are not intended for permanent residence,
- It is permissible to install infrared heated floors not only in apartments, but also in office buildings,
- The heat waves emanating from the mounted system correspond in their characteristics to the sun's rays,
- The failure of one or more elements does not affect the operation of the entire system,
- The penetration of heat waves from below allows you to evenly distribute heat, creating comfortable conditions in the room,
- IR systems have a long service life.
And to the disadvantages:
- High energy costs,
- With the wrong choice of flooring, the effect of the use of the material can be significantly reduced.
Infrared Underfloor Construction
The IR floor heating system is based on the ability of some materials to emit heat waves when heated. This phenomenon is based on electromagnetic radiation, which produces waves up to 100 microns in length.
Such an emitter in an infrared film is a carbon coating, which is heated by the passage of electric current through conductive strips of copper and silver, as a result of which the floor covering and the room are heated.

Some rays have the ability to pass through the floor, and therefore the placement of infrared film under the dimensional furniture is prohibited, as the system may overheat. Manufacturers produce infrared material with a consumption of up to 440 W / sq.m., But for a device for heating under laminate floors, the maximum power is limited to 150 W / sq.m.
IR film is available in rolls of various lengths, the width can vary from 500 to 1000 mm. For ease of installation, independent blocks are formed along the entire length of the roll with places of cutting with a pitch of 200-250 mm.

Which laminate to choose for subsequent installation over an infrared warm floor
Laying a laminate on an infrared warm floor occurs in the usual manner, but in order to avoid possible side effects, it is recommended to select certain models of flooring.
Unsuitable lamellas for characteristics wear out quickly, cause the film to rupture, and, in some cases, begin to release substances hazardous to health.

So that in the end you do not have to completely redo everything, when choosing a laminate, you should adhere to the following instructions:
- Start the selection with the type of lock connection. Installation of lamellas should be carried out exclusively by fixing to the spacer, without the use of adhesives. Otherwise, with periodic heating and cooling of the base, the joints will break.
- The task of flooring is to let heat waves into the house, and therefore, when choosing a specific type of laminate, it is recommended to select boards with a minimum coefficient of thermal resistance. The corresponding marking is applied on the packaging of the finished product. Recommended Options: no more than 0.1 sq.m. x ° K / W.
- Board thickness also matters. On excessively thin boards, with changes in the temperature regime, locks will break, and too thick lamellas will become an obstacle to the passage of heat into the room. For infrared floors, it is recommended to use thick slats no more than 9 mm and not less than 8 mm.
- It should be remembered that for the production of laminate boards use adhesive compounds, which include formaldehyde. This substance begins to evaporate at temperatures above 27 ° C, so when choosing a coating, you need to carefully study the characteristics of the material. Laminate class E0 and E1 does not emit harmful substances when heated.
- The strength of the flooring is affected by its ability to resist surface wear. On this basis, for laying infrared warm floors under the laminate, it is recommended to use boards with wear resistance class of at least 3.
- When installing an infrared film underfloor heating under a laminate, it is allowed to use not only wooden laminate products, but also made of vinyl, which significantly expands the list of options available for selection.

Following the tips above, you can easily find and buy a laminate under an infrared floor heating. How to choose a material based on the listed characteristics? It is necessary to pay attention to the designations that are applied to the packaging material (see photo below).
Is it possible to do floor heating with laminate
Putting a warm floor under the laminate is possible, but only if the laminate is special - for underfloor heating. Why is it impossible under the usual? There are three reasons.
- The base of the laminated coating is MDF. And this material has a low thermal conductivity. And this indicates the low efficiency of such heating. In a special laminate for laying on a warm floor, a denser version is used - HDF, which conducts heat better.
 Installation of IR floor under the laminate - the most popular type of heating
It is for these reasons that it is worth laying a specialized laminate on the heated floor. The description usually indicates its suitability for use at elevated temperatures.
 Pictograms for designating a floor compatible laminate
Pictograms may appear on which there is a heating symbol. They are recognizable, but have a different color, can have different signatures, shapes and sizes. But the essence can be understood.
Laminate heating temperature
First of all, it is worth remembering that the temperature of heating a laminate, even a special one, cannot be higher than 25-27 ° C. Some species can withstand temperatures up to 28 ° C. If your floor heating serves to “keep your feet warm”, and is not the main heating system, this temperature is quite enough. Just to make your feet feel good. If a warm floor is considered as the main heating, it is necessary to carefully calculate whether there will be enough that heat that will be released when heated to such a low temperature.
 The maximum temperature of the underfloor heating under the laminate is indicated by the manufacturer
Can laminate be heated to higher temperatures? Manufacturers recommend a temperature of no higher than 27-28 degrees. Theoretically, if you increase to 30-32 degrees there will be no big trouble. This coating can withstand heat up to 200 ° C for a short time. But with increasing temperature, the size of the dies increases. And this can cause a "swollen laminate." This will happen if the gap left around the perimeter is insufficient to compensate for the increase in size. If there is no problem with the gap, during critical cold weather you can raise the temperature above the recommended one. But in general, it is better to adhere to the recommendations of manufacturers.
Another point: 27-28 degrees - this is the temperature of the floor, which we feel as comfortable. And it does not contradict the SNIP. This is the main consideration for which such a temperature regime is recommended.
Types of floor heating under the laminate
What type of heating do under the laminate? If it is supposed to be rolled up into a screed, then the type is at your discretion. Water, heating cable, mats. Everything fits. But just before laying the laminate it will be necessary to dry the screed thoroughly. Soak until the concrete has matured and normal operating humidity has been acquired. Otherwise, after laying, the laminate will swell due to moisture absorbed from the base. After returning to normal humidity, it remains warped. So this is a very important point.
 What type of heating in the screed does not matter. It is important that it is even and dry.
If the laminate is laid on an already finished floor, but you want to make it warm, then the best solution is a film heater. It is also called carbon or infrared underfloor heating. This type can be laid on any flat base. Concrete floor, lined wooden, plywood, GVL, chipboard, TsSP and other sheet materials. The main requirement is a dry and even base. There are no special claims to the materials.
Laminate infrared underfloor heating: general device
What is good film underfloor heating under the laminate? Its laying in one room takes several hours. True, if the base is pre-aligned. The process is simple. The film is cut into sections of the desired length, laid out on the floor and connected by wires that are wound on the thermostat. For the normal functioning of the system, a temperature sensor is also required. The laminate is immediately placed on the laid film and the system is ready for operation. Simple and fast.
How expensive is such a floor heating with a laminate during operation? Depends on how well the floor insulation is made. Well, and on how "thermophilic" you and your household. If there is a thermostat, the system at full power, if it works, then only after switching on. Until the floor reaches the set temperature. Then for maintenance, it turns on for only a few minutes.
 In addition to the heater, a temperature controller and a temperature sensor are also required.
The longest process in installing an infrared warm floor under a laminate is installing and connecting a temperature controller. It must be installed on the wall.
 The longest processes in the installation of infrared film - thermostat and sensor
They usually put it in the socket, so you need to drill a hole in the wall. There, get wires from the shield - to power the thermostat and the heating elements themselves. And the wires from the infrared film will need to be wound up and connected to the thermostat on the other hand. So the gate is also needed from below - from the floor to the entrance to the socket. This is the longest and dustiest process.
Film underfloor heating under the laminate: with or without backing
If the floor insulation is sufficient, it is possible to install an infrared warm floor under the laminate without a substrate. But in this case, the floor will be even more “sonorous”. Without a substrate, the drum effect will increase.
The substrate may be:
- made of foamed polyethylene (with or without a foil layer),
- cork (from agglomerate of pressed cork),
- coniferous.
The cheapest is made of polyethylene. But it shrinks over time, loses its elasticity, ceases to “damp” sounds, and it hardly retains heat. Cork is good, but expensive. The most acceptable option in terms of properties and costs is a coniferous substrate for a warm floor and laminate.
 What layers does an infrared warm floor consist of?
And how to determine the thickness of the substrate? By the standards. For the heating to be effective, the coefficient of thermal resistance of the pie of the entire floor covering should not be higher than 0.15 m² * K / W. That is, you need to know this coefficient of the laminate and the selected type of substrate. If their sum does not exceed the specified limit, this “pair” can be used. If the amount turned out to be larger, the thickness of the substrate is taken less or another one is used. But the sum of the thermal coefficients is again compared with the norm.
Installation of a film underfloor heating under the laminate: procedure
Laying the infrared film on the floor under the laminate itself is simple. But first you need to spread the substrate. It is better to glue her joints with tape. If the material is rolled, it is advisable to let it lie down so that it is leveled, and then glue the joints.
 Here is a film placed under the laminate for heating
The cork can be laid across the entire area at once, but you must walk carefully. The rest of the materials (especially the coniferous substrate) are better to be spread out in strips about a meter wide, to lay the coating, and only after that to lay out another strip of the substrate. Foamed polyethylene and coniferous substrate are damaged from point load. It’s better to save them.
Laying a film underfloor heating under the laminate: what is a film underfloor heating
The infrared warm floor is two layers of vinyl film between which strips of carbon paste are rolled up. The strips are connected using a copper bus, which runs on both sides. The current is supplied through copper busbars, passes through a carbon paste, which heats up. This is how a warm film floor works.
 What is a film warm floor
The film is sold in rolls of several meters. It can be of different widths - 40, 50, 60, 80 and 100 cm. Every 25 cm of length there is a dashed line along which the film can be cut, cutting pieces of the required length from the roll. So the required configuration of the film infrared floor for the laminate is dialed.
Infrared underfloor heating under the laminate: laying rules
The first thing to remember is that we do not put a heater under furniture, carpets and other massive objects. That is, we do infrared heating of a heat-insulated floor only in a zone free from furniture.
 Rules for laying infrared film under the laminate
You can roll out the film along both the long and short sides of the room. But there will be less electrical connections if the film is laid out along the long side. Also remember the following rules:
- The distance from the walls to the edge of the film is at least 100 mm (10 cm).
- We lay out the film sheets so that the copper busbars do not touch and in no case overlap. It is better if there will be a distance of at least 10 mm between them.
 Different widths of the carbon film allow you to choose the heating elements of the required format
If a film of the same width “does not fit,” taking into account all the rules, you can take a piece or several strips of greater or lesser width - as you require.
Laying the film warm floor itself is simple and takes several minutes. We roll the film in compliance with the above rules. You can fix it with double-sided tape to the substrate, you can use brackets from a stapler. Brackets are put on the edge of the film, where there are no conductive tires. The width of the edge is about one centimeter, so there is enough space. How often to fix? Just so that the film does not move when installing the floor covering.
Electrical connection: how to power the thermostat
It is better to install a thermostat for a warm floor before laying the film. Even before spreading the backing. You will need to make a hole in the wall under the socket and two strobes. One to the nearest junction box, the second from the socket to the floor.
 The electrical circuit for connecting a warm floor under the laminate
From the junction box to the socket, we lay the power wires for the underfloor heating and thermostat. To the junction box, they must go from the shield. Since this is heating, its power will be several kilowatts for sure. Therefore, it is not worthwhile to “cling” a warm floor to an existing line. It is optimal to install a separate circuit breaker and extend a separate line. The cable cross section depends on the total power of the film heater.
- less than 4 kW - 2.5 mm²,
- from 4 to 6 kW for concealed installation (in a pipe) a section of a copper core of 4 mm² is sufficient,
- from 6 to 8 kW - 6 mm².
 What to connect to on the thermostat: power, load, sensor
 For wiring, we take not the wires in the shell, but the cable. They differ in the degree of protection and reliability of isolation. We need a cable. The most common is VVG. For wooden houses, it is better in a non-combustible shell (VVGng). Number of cores - three or four. Three are two power and grounding. Most often used in houses and apartments. Four - if there is also a protective zero.
Yes, the heater will rarely work at full power with a thermostat, but it’s definitely not worth saving on electrical wiring. It is better to take a good cable with a "margin" in cross section. In this case, even at maximum load, it will not warm up.
Temperature Sensor Installation
How does an infrared heated floor with a thermostat work? On the programmer, you set the temperature for heating the floor. This temperature is measured by a temperature sensor. If the specified threshold is exceeded, the controller turns off the heating. When the temperature at the sensor drops one degree below the set temperature, the heating is switched on again. This maintains an almost stable floor temperature.
 Temperature sensor for underfloor heating: appearance
As you can see, the sensor in this circuit is very important. The bad news is that it often crashes. Good - it is inexpensive and its replacement is not too "annoying" the wallet. But to change the temperature sensor was easy, you have to complicate the installation - lay a plastic box, a pipe of a small cross-section or a corrugated hose. We are already stretching the sensor into it. But so that the sensor itself is outside, and not in the box / pipe.
Choosing an installation location
The temperature sensor itself is a small cylindrical capsule with a long cable / wires. When replacing, the old sensor is disconnected from the thermostat and simply pulled out by the cable. This capsule is placed on the floor, between the strips of the warm floor. It is more convenient if the sensor is opposite the thermostat - replacement is easier.
 Choose a place to install the heat sensor so that it is easier to change
Here are two examples of the location of a temperature sensor. The option on the right is fully functional. But only when replacing it will be very difficult to go through a 90 ° turn. The fewer turns, the easier it will be to change the temperature sensor of the warm floor. In an extreme case, it is better to make two obtuse angles by laying the pipe not perpendicular to the wall, but at an angle.
 Options for attaching a temperature sensor to an IR film
The plastic pipe, corrugation or box must be "flush" with the substrate. The substrate at this point is usually cut out. If necessary, make a small depression in the floor. It is important that the structure does not protrude. Depressions (if any) are poured with quick-setting repair compound. Please note that the sensor itself must lie outside the duct / pipe. So he will really measure the temperature of the floor.
You can, of course, do the same as in the photo on the right. Everything will work. But until the sensor breaks. And to replace it, you have to disassemble the laminate, lift the film. Only after that will it be possible to replace with this installation method.
Electrical connection
Physically, we pull the wires from the sensor along the strobe to the thermostat. We usually connect it to the extreme terminals. The models of temperature controllers can be different and the number of terminals for connection is different. But usually these are the extreme right numbers - 5 and 6 or 6 and 7. There are some models in which the terminals for connecting the temperature sensor are numbers 1 and 2. Usually there are some signs, if in doubt, see the documentation.
 Connecting a temperature sensor to the thermostat: to which terminals
- strip the ends of the wires from insulation by 10-14 mm,
- unscrew the fastening screw a few turns
- twist the bare wires into a bundle,
- insert between the contact plates
- with a screwdriver, tighten the clamping screw until it stops,
- pull the wire well a couple of times - it should not move,
- tighten the screw if necessary.
There may be different types of clips, but the technique itself is not too different. In expensive models, there may be clips with automatic locking. There, all you need to do is insert the stripped wire into the correct socket.
 Connections for infrared underfloor heating under the laminate: the wires should not be exposed
In any case, make sure that the bare wires do not extend beyond the contact group. Insulation should be visible from under the contact plates.
Connecting the IR floor to the thermostat
If the carbon film was bought in a kit, contact plates, pieces of insulating material go to it. All components can be bought separately, but we must assume that it will turn out cheaper.
 The set of film floors includes contact plates, wires and pieces of insulating material
Cables can be included. If they do not inspire confidence, it is better to replace them. Take copper stranded cross-section of 2.5 mm². They should be flexible enough, in reliable isolation. You can take all the same VVG, but two-core.
Film underfloor heating under the laminate: installation of contact plates and insulation
To connect infrared heating, contact plates must be attached to the busbars on the film. But first, the edges of the buses that are not used during connection must be insulated. These are the edges of the tires that were in the farthest part of the room from the thermostat.
 Insulation of cut tires on a heating IR film
We take a piece of insulation, remove the protective film and fix it so that the edge of the film with the cut bus is covered by insulation. Half of the insulation is attached on one side, the edge protrudes by several millimeters beyond the edge of the film. When you bend the free half to the other side and glue it, the insulation will be almost perfect.
Next, proceed to the installation of contact plates. They must be put on the bus itself, and they are covered with a film. To install the film, we cut a few millimeters along the tire. We introduce a plate into the section and move it further so that the contact area contacts the copper to the maximum.
 How to install contact plates on a heating film under a laminate
Make sure that, on the other hand, the plate is in contact with the tire. Now take the pliers and clamp the contact. The next step is connecting the wires, and then the insulation.
Wiring diagram for infrared floor heating under the laminate
Pieces of infrared film are connected in series to the thermostat. As in the diagram. On the thermostat housing there are two outputs for connecting the load. To one we connect the blue wire, to the other - red. Other colors are possible, but they must be different so that they are not confused when connected.
 How to connect a heating film to a thermostat: diagram
Next, we put the blue wire on the left (for example) contact of the first strip. We put another piece of blue wire in the same contact, we clamp the edges of the contact. Remember to strip the insulation about 10 mm and twist the two conductors tightly into a bundle. Only then lay in the contact plate and clamp.
Pull the free end of the blue wire to the second strip. The contact is also left. It also contains two wires - one from the strip to the left, the second to the strip to the right. So we get to the last lane. There will be only one wire. Next, we pull the red wire in the same way, but we connect it to the right pins installed on the film.
 This is how the electrical connection of the film underfloor heating looks live
So it turned out that all the pieces of the film floor under the laminate are connected to the thermostat. We carefully tighten the “ears” of the plate to ensure good contact. To check, we carefully pull the wires several times. They should not pop up. They shouldn't even move. If there is a soldering iron, it is better to solder the wires, and then squeeze the edges of the plate. At this stage, it is necessary to test the warm floor. We supply power to the thermostat, turn on the heating and wait 5-10 minutes. During this time, all the strips will start to warm up. If some does not heat up, we check the installation of the plates and the connection of the wires. If all the strips have become warm, we continue to install the warm floor. There is very little left.
Now it's time for isolation. Each plate requires two pieces of insulation. We put one below. It should completely cover the plate and go beyond it by at least 10 mm. On top we cover with a similar piece of bitumen insulation. Glue by pressing with your fingers. Everything. It is possible to lay a laminate.
Need a film under the laminate or not
When laying a film underfloor heating under a laminate, it is often recommended to lay on top of an infrared film an ordinary polyethylene film. It is considered as a vapor- and hydro-insulating material. Do you need this film or not? In the laying schemes that manufacturers offer, it is not. In practice, they put it very often. From those considerations, it is better to play it safe and protect yourself and floor heating from possible leaks. Manufacturers do not mind, but do not include in the recommendations. So it's up to you.
 Vapor barrier over film heater - optional
If you decide to put the film, take a tight one. Not less than 300-350 g / m². And stack without cutting, but as it is, with your sleeve. The sleeve width is usually 150-200 cm, which is rarely enough for the entire width of the room. If you glue strips, make a run of one strip on another by 15-20 cm. And glue the joint twice with double-sided tape. And the adhesive tape should be good, with high adhesive ability of the sticky layer. You need to ensure the tightness of the connection.
 Film over the IR floor can often be seen
And wind the edges of the film on the walls, there, fix it on a double-sided tape too. But this time the adhesive tape should be painted so as not to damage the wall decoration. When lay the coating, cut off excess film flush with the coating. All this "beauty" will then be covered with a plinth. By the way, it must be fixed to the wall, and not to the floor, so that the laminate can expand and contract depending on temperature and humidity.
Only under such conditions does laying the film on the IR floor make sense. And it will also be necessary to use soft shoes during installation so as not to damage the film.
Features of the heating system
Proper installation of a film underfloor heating under the laminate suggests that it will be performed taking into account all the nuances of combining the two structures. In their work, heating equipment uses infrared waves. Inside a thin multi-layer panel, emitters emitting infrared waves are soldered. They move up, where they are delayed by massive objects. In this case, flooring. It accumulates heat in itself, gradually giving it to the air.
Radiation is generated by carbon fiber emitters collected in several bands. In more powerful systems, the web is continuous. In any case, conductive busbars made of bimetal are located along its edge, which are responsible for the transmission of electricity to the heater. The power of the equipment varies from 120 to 230 watts. The sizes and thickness of the panels vary.
The latter figure does not exceed 2 mm, which allows you to easily mount the material under any coating. The width of the standard film can be 100, 80, 60 and 50 cm. For ease of use, the canvas is divided into segments between which it can be cut. The average length of such a fragment is 20 cm. Thus, if necessary, you can mount a heating floor of any, even very complex shape.

Film floor under the laminate: what to consider when choosing a coating
Standard slats cannot be mounted on heaters. There are several reasons for this:
- The panels have low thermal conductivity, which will interfere with the heating of the room.
- Under the influence of high temperature, the geometry of the plates may change, as a result, the surface may warp.
- When heated, artificial turf can release toxic substances.
All these are serious enough reasons to refuse to use it. However, there are special material models designed for laying on the heater. A special marking has been developed for them, which must be applied to the packaging. Another important point: the mandatory presence of locks on the lamellas. They should be laid only by floating floor technology, that is, without communication with the base. In this case, the laminate cannot be glued.

Rules for placing a heating sheet
Heating of this type can be both primary and secondary. In the first case, it is necessary to put the film on 70% of the area, in the second it all depends on the quantity and power of the main heat sources. However, in any case, important recommendations should be considered.
- It is forbidden to place heat insulating objects on the floor covering above the film. Such as large furniture without legs, thick carpets, etc. The system in such areas overheats and may fail.
- Heavy objects, such as large-sized household appliances and furniture, should not stand above the infrared cloth. The lamellas under them can bend, which will lead to excessive pressure on the heater. In such conditions, it breaks quickly.
- If combined heating is intended, the laminate must not be allowed to heat from two heat sources at the same time.
- It should be borne in mind that the heating zone of the film material goes beyond its physical boundaries. For this reason, it is not recommended to lay it close to walls, large furniture, etc. The indent should be about 3-10 cm. It depends on the power of the equipment.
It is optimal to lay the heating panel at a distance of 0.5-0.6 m from each wall. This will make it possible in the future to painlessly rearrange the furniture, if necessary.

Step 1. We equip the base
It must be dry, even and hard. Laminate can only be laid on a level base. Therefore, if the height differences exceed 2 mm per linear meter, additional work will have to be done. To level the concrete screed, it is optimal to fill it with a leveling mixture and wait for it to dry completely. The wooden surface is easiest to level with plywood.

Step 2. Putting insulation
For the normal functioning of the system, it is necessary to equip the heat-reflecting layer. Standard aluminum foil in such cases is not suitable. This is because the heater is electric, therefore, the substrate should not conduct current. Otherwise, accidents are possible. As an insulator choose polyethylene foam or cork with a reflective layer deposited on it.
Before laying the material, thoroughly clean the base from debris and dust. Using a vacuum cleaner is required. We spread insulator strips on a clean surface. We cover the entire area of the room, even if the infrared film is not laid everywhere. We put the cloths back to back one to the other with a small approach to the walls. In order to avoid insulator movements, we fix it with tape or fasten it directly to the base with a stapler.

Step 3: lay out the film
We roll out the stripes, orienting them along the longest sides of the room. In this way, the number of contact connections can be minimized. If necessary, cut the canvas, but only in special areas, which are marked with a mark. In the process of laying, we make sure that the integrity of the elements is not violated. The canvas should be laid so that there is no overlap.
When laying, the copper busbars must lie down with the shiny side down. This is necessary to further connect the contacts. The sheets must be fixed to the substrate using tape.
After all the heaters are laid out, we determine which buses will be connected to the cable. All areas not involved in switching are immediately carefully isolated. To do this, close them with bitumen tape, which should be included in the equipment set.

Step 4: Put the temperature sensor
For the correct operation of the system, the element is located at the coldest point of the room. Moreover, it should be in the middle of the strip width, so that the distance from its edges is the same. Do not place the sensor close to a wall. Between them should be at least 500 mm. Another important point. If the standard cable of the device is not enough to lay it in the selected place, you should choose another. It is forbidden to grow wire.
We cut out the groove in the substrate for the sensor housing and the channel for mounting its cable.We put the element in place so that it is located on the carbon heater. We fix the device with a bitumen tape, stretch the cable from it to the thermostat. We lay out the film and fix it to the substrate.

Step 5. Install the terminals
In areas where the radiating equipment will be connected to the circuit, it is necessary to put special clamps-terminals. Most often they look like clips. In this case, the upper petal of the element is inserted into the contact section of the film, and the lower one is brought under it. Then we take the pliers and tightly, but gently crimp the terminal, providing it with reliable contact with the copper bus. Sometimes there are other types of connections, the rules for their assembly should be found in the equipment manual.

Step 6. Connect the cable
We stretch the wire, placing it near the connection areas. Typically, cables are routed to one side of the system: it is more convenient to connect them to heaters. Although it is possible to output the zero and phase wires to opposite sides of the room. In this case, you must especially carefully connect, so as not to select one conductive bus for switching both contacts.
The ends of the laid cables are cleaned from insulation by about 1 cm and inserted into the contact terminal. Compress the resulting connection with pliers. Reliably isolate it with a bitumen tape. Glue the strips on top and bottom of the contact, gently crimp. The result should be a waterproof capsule that protects the compound from possible ingress of water.

Step 7. Connect the thermostat
The technology of laying the heating floor suggests that all cables must converge at one point. Where they fit the thermostat. It can serve several sections of the system at once, in this case it is extremely important to correctly select the accessories to connect. It should be only certified terminal blocks, home-made twists are not allowed.
The temperature controller control unit is equipped with special connectors to which the wires are connected. To prevent errors, pictograms have been developed that indicate the areas of grounding, load, and supply voltage switching. After connection, we lay each cable in a special channel and fix the thermostat in place.

Step 8. Test run the system
We check the integrity and correctness of all the connections made and start the heating floor. If everything is done correctly, it should work fine. If you identify any problems, you should fix all the flaws and restart the equipment. For clarity, we offer video installation of a film underfloor heating under the laminate.
Step 9. Installing the coating
Heaters do not tolerate the effects of water, so it is necessary to put insulation on the canvas. A plastic film of 200 microns will be enough, which will protect against moisture and will not delay infrared radiation. We cut the material into strips of the desired length and lay it on top of the heating structure with a slight overlap. Be sure to glue them with tape.
Now you can start mounting the cover. How to lay the selected model of the laminate, you need to look at the packaging. The manufacturer must give recommendations for the best result. When working, you must be careful to avoid accidentally spoiling the film heater.
Types of film underfloor heating under the laminate
Currently, there are two types of film floor heating systems:
- infrared (carbon or graphite),
- bimetallic convective (aluminum and copper).
They differ among themselves not only in the material from which they are made, but also in the way of heating. They are united only by the manufacturing method: the heating system is a thin cloth, a few microns, consisting of heating elements that are sealed in a durable film. The heating elements are interconnected by flat current-carrying conductors or tires, which are located on the sides. Current flows through these elements and heats the floor. There is also a difference in wavelength: IR and thermal.

Underfloor heating with bimetal heating element
A double layer of polyurethane film is the basis of this system. It is recommended that this design be connected through an automatic circuit breaker for automatic circuit breakers or residual current devices, as it does not have a ground connection. This type of system is mounted quite simply. The canvas with heating elements is easily rolled up, and it can also be cut into pieces of the desired size. However, you must adhere to certain rules in order to properly install the system, and then use:
- Do not raise the heating temperature above 27 ° C to avoid deformation of the floor covering.
- The film system is not suitable for heating ceramic tiles and porcelain tiles.
- In combination with other types of topcoat, bimetal systems perfectly distribute heat, they are functional and practical.
The Teplofolnano film floor heating system has been very popular lately. This system is an aluminum conductor, which is located between two layers of high-temperature film. Thanks to the metal heating element, the system has a long service life and a high degree of reliability. The floors heat up quickly and evenly due to the close proximity (1 mm pitch) of the thin strips of the conductor to each other. Moreover, the system capacity is sufficient to apply this type of film floor in difficult climatic conditions of Russia.
A special mounting cable for connecting the film floor is made taking into account high mechanical loads. The Teplofolnano system during installation does not take up useful centimeters of space, since the thickness of the heating film is only 1 mm.
Electricity consumption by a film heat-insulated floor
Depending on the operating conditions and the power of the underfloor heating system, the level of electricity consumption varies. It is necessary to minimize heat loss in order to reduce energy consumption, only then it will be possible to save on payments. If the installation of the film warm floor under the laminate was done incorrectly or there is significant heat loss, then it is impossible to achieve such an energy consumption as indicated on its packaging.
At the same time, manufacturers of IR films indicate the maximum power consumption on the package, but if all the conditions are met during installation, the indicators can be much lower. For example, if the usable area of a room is 12 m2, then a 150 W floor heating system will consume about 1.8 kW in 1 hour.
Most often, the underfloor heating system is turned on for 8-10 hours a day: in the morning, when everyone is going about their business, and in the evening, when households return home. Of course, everyone builds a schedule for the system on their own, based on the needs of the inhabitants of the apartment or house. Usually, over 8 hours of operation, a warm floor consumes 14.4 kW of electricity.
Recommended articles on this topic:
If you calculate how much electricity will be consumed per month, then about 432 kW comes out (the calculation was made from the data given above for an example). Of course, this is quite a lot, but nevertheless, the IR film floor heating system, in comparison with other designs, is the most profitable option.
It is also worth noting the fact that the main power consumption occurs during the heating of the room, then only maintaining the desired temperature and energy consumption is significantly reduced. In addition, the underfloor heating should not work constantly. It turns on as needed, depending on how long the room can keep warm.

It is possible to reduce power consumption up to 20-30 watts per 1 m 2, which, undoubtedly, is a very profitable and effective indicator if the room is qualitatively insulated in accordance with climate conditions. This means that electricity consumption will decrease by about 5–7 times, respectively, the indicators will be 1.92–2.88 kW per day (about 8 hours of operation).
How to lay a laminate on a film floor heating
There is an opinion that it is impossible to lay a laminate on a heating system, but this is not true. It is only necessary to observe certain laying conditions and precautions, which are indicated by the manufacturer in the instructions or on the packaging of the laminate.
Laminate flooring goes well with underfloor heating. This fact is confirmed by the corresponding marking on the package. Especially if the manufacturer is part of the Association of European manufacturers of laminated flooring (EPLF®).

Economy-class laminate with lamellas 6 mm thick may not be suitable for underfloor heating. But there are exceptions, so you need to look at the markings on the package. Basically, a laminate with a thickness of 7 mm, a density of 900 kg / m 3, 32 classes and higher can be used in conjunction with any heating system.
However, experts warn that thickness, price and class are not always a guarantee that the laminate is compatible with underfloor heating. For example, a Chinese laminate often has a loose structure, and although the plate thickness is 12 mm, it is not suitable for use with a heating system. In addition, the locks on such a laminate are very often waxed. Nevertheless, the Chinese laminate can be factory-made, and then its packaging then necessarily has the corresponding marking, which informs about the possibility of combining it with a warm floor system.
We present to your attention the basic requirements for laying and further use of the laminate with a heating system, which were made by leading manufacturers.
Note that the exact instructions must be found in the instructions or on the packaging of the laminate you purchased:
- The maximum heating of the laminate at the floor level with the heating system is 27–28 ° С.
- It is recommended to use a special waterproofing substrate. You can lay a separate vapor barrier layer with a thickness of 0.2 mm or an ordinary plastic film to the substrate.
- It is desirable that the layer of the substrate for the film floor under the laminate together with the warm floor system does not exceed 2 mm.
- If a heating system will be installed on the floor, then it is not recommended to use additional heat accumulators: carpets or other interior items. Or you need to choose the appropriate temperature mode so that there is no overheating of the system.
- Power 60 W / m 2 - the recommended indicator for heating elements.
- Relative humidity should be between 40-60%.
- Take care not to dry the air.
- The optimum indoor temperature is 18–23 ° С.
- Laminate is unstable to sudden changes in temperature on the floor surface, and in order to prevent it from deforming, it is recommended to install heating elements with a “snail” or “double snake” when installing a water heating system. In addition, it is necessary to adjust the water temperature at the inlet and outlet.
- The thickness of the screed over the electric underfloor heating should not exceed 2 cm.
- It is necessary to warm the screed before laying, regardless of what temperature conditions the laying of the heating system of any type is done.
- The slope of the floor is allowed no more than 2% of the size of the room, but not more than 50 mm.
- The difference in the base of the floor is not more than 2 mm per 2 m length.
- A temperature gap should be made around the entire perimeter of the room, not more than 6-10 mm.
- During the installation of the underfloor heating, all heating devices must be turned off.
- The base of the floor must be heated to a temperature of 15–20 ° C.
- The first week of using the warm floor, and also after a long break in work, it is recommended to set the temperature on the regulator to no higher than 20 ° C. Then you can gradually increase the indicator to 28 ° C.
- The thermal resistance of the laminate with the substrate should not exceed 0.15 m2 * K / W.
You can start laying the laminate only after a thorough cleaning of the floor surface, since even small debris can interfere with the high-quality assembly of the laminated boards, and later creaks of the coating may appear.
The next step is laying a plastic film with a thickness of 150 microns. Most often, one canvas is enough. The main thing is that the film should have a margin of about 100 mm along the edges, which would go onto the walls. In the case when one sheet is not enough, another sheet should be laid with an overlap of at least 100 mm. Then the junction of the film is glued with mounting tape.

A polyethylene layer is necessary for better waterproofing, since during operation someone could accidentally tip over a bucket of water or pour out a full cup of tea. As you know, liquid should not get on the heating elements.
It is very important to draw up an approximate layout of the laminate. There are situations when they begin installation without preliminary calculations and at the beginning of the wall (in width) they lay a whole board, and at the end of the row it turns out that there remains a narrow gap with a width of less than 50 mm. Such a narrow gap cannot be qualitatively latched into the lock, and at the same time it cannot be left. To prevent this from happening, experts recommend trimming the first and last boards by ½ of the gap (in width), then it will be possible to install the last strip in a row without gaps.
There is another problem of the first strip - because of the existing curvature of the wall, it is impossible to position the floorboard stably along it with emphasis on wedge inserts. In this case, it is recommended to temporarily fix the assembled strip with baited screws in those places where the baseboard will be screwed.
Operation of a film heat-insulated floor under a laminate
After installing the heating system, you need to draw a plan for laying it under the laminate, and you also need to fix the location of the strips and wiring. It is recommended that you keep this plan so that when you rearrange the furniture, you can know where to put it in order to avoid overheating of the warm floor.
In addition, it may be necessary to make through fastenings to the concrete screed in order to install the interior items - the layout of the warm floor will also help prevent damage to the heating elements.
To measure the temperature of the floor and air, electronic thermostats are equipped with two sensors. Therefore, you can not use only an air sensor when programming the system, as there are restrictions on the heating of the laminate.
There are two ways to set the correct algorithm for the operating mode of the floor heating system:
- Use only floor sensor readings. It is possible, for example, to set the heating on if the temperature is below 25 ° C, and off if the temperature reaches 29 ° C.
- Use the readings of both instruments. For example, the system will automatically turn on if the room temperature is 23 ° C, and turn off if the air sensor is at 26 ° C or the floor sensor shows a temperature of 30 ° C.
It will take to disassemble part of the laminated floor and raise the waterproofing film, as well as the damaged heater blade in the event of a breakdown of the floor sensor and its replacement. You can avoid the described labor-consuming actions if you take care in advance to purchase an additional sensor and install it during the installation of the warm floor. The wire from the additional sensor must be routed to the thermostat.
If the main sensor fails, it will be possible to unscrew the two wires from the thermostat from it and connect the contacts from the spare sensor.
Are you afraid that starting repairs, it will never end?
With the company "My Repair" this will not happen.
- Clear deadlines. We will refund 5% of the order amount for each day of delay,
- Quality assurance. All unforeseen expenses are compensated at your own expense,
- Fixed estimate. The cost of work will not increase. Immediately fix the price in the contract,
- Installment plan 0%. No down payment. Start the repair right now,
- Free design project. Design project and 3D visualization of your apartment.
Request a call and find out the cost of your repair!